
In this tutorial we will show you how to setup an AVR Eclipse development environment on Windows.
Installing the AVR-GCC toolchain
The AVR-GCC toolchain is a collection of tools which are used to compile and upload firmware to AVR microcontrollers. The toolchain comprises of:
- GCC – The C/C++ Compiler
- GNU Binutils – A collection of tools, including the assembler, linker and other tools to manipulate the generated binary files
- AVR Libc – A subset of the standard C Library with additional AVR specific functions.
- GDB – The debugger
- AVRDude – Used to upload and download firmware
There are many ways to get and install the toolchain including:
- Roll your own
- WinAVR (project now inactive)
- MHV AVR Tools
- Atmel AVR toolchain Installer
Each of these options draws the same codebase but there are differences in release schedules, packaging and compilation options for the binaries. We will be using the Atmel AVR toolchain Installer.
To install the toolchain:
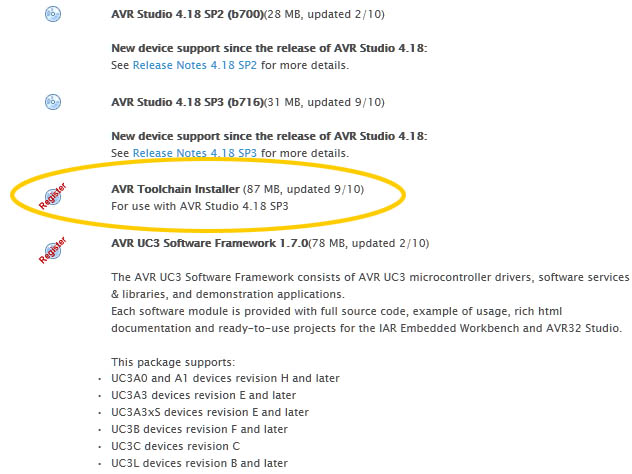
- Navigate to http://www.atmel.com/dyn/products/tools.asp?family_id=607#soft, scroll down and click on the Register icon
- Enter your details then click “Click to Download”. You will be sent an email with the details of the download.
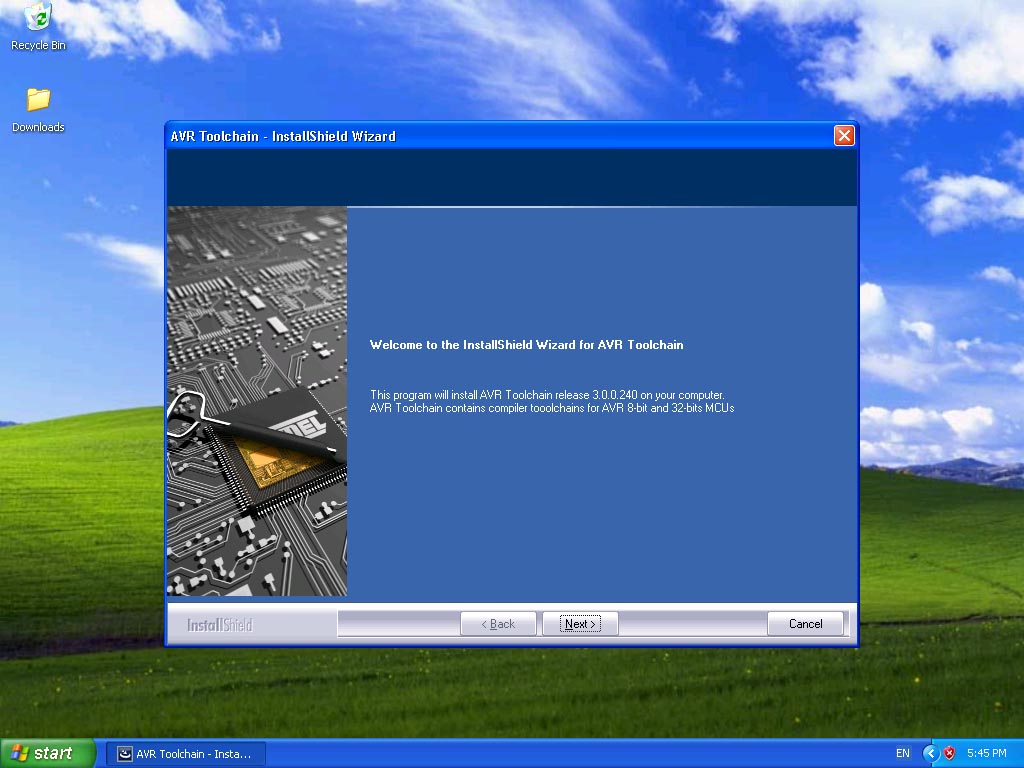
- After downloading the install file (avr-toolchain-installer-3.0.0.240-win32.win32.x86.exe), run it to start the installation.
- Install the toolchain with default options
Install the Eclipse IDE
Whilst you can compile and upload firmware using the toolchain alone, an IDE makes life a lot easier. The Eclipse IDE is an extensible easy to use environment and is the subject of this tutorial. To install it:
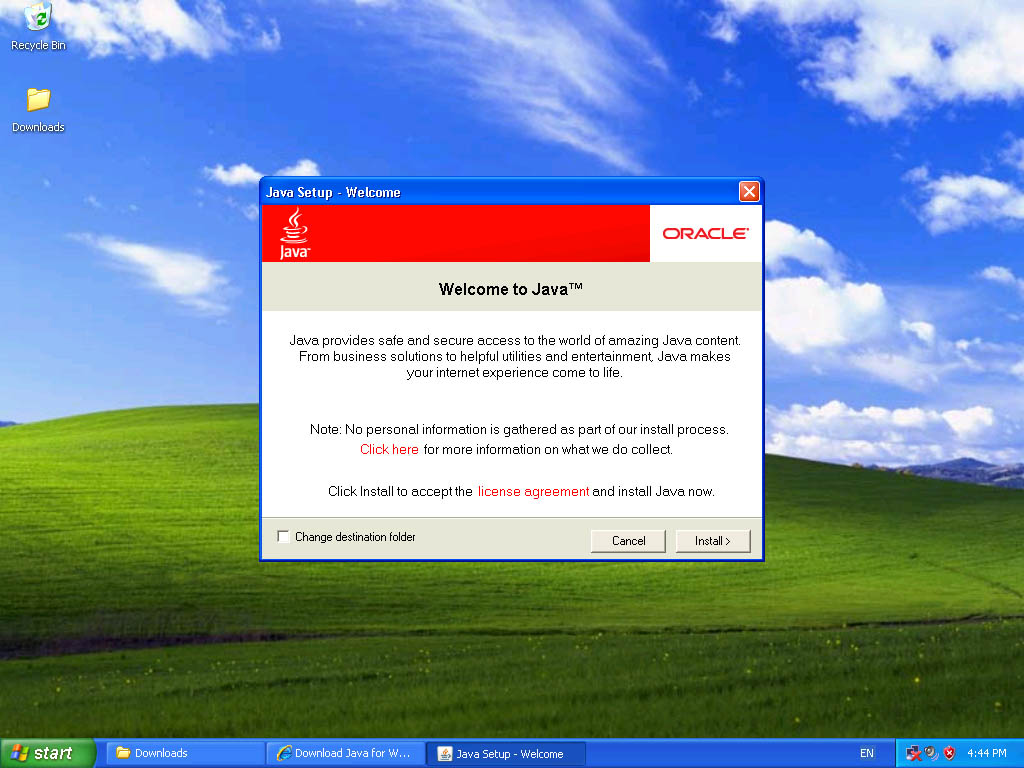
- Navigate to http://www.java.com/en/download/
- Download and run the installer
- Install the Java Runtime Environment (JRE) with default options
- Download the Eclipse IDE for C/C++ Developers (eclipse-cpp-helios-SR1-win32.zip) from http://www.eclipse.org/downloads/
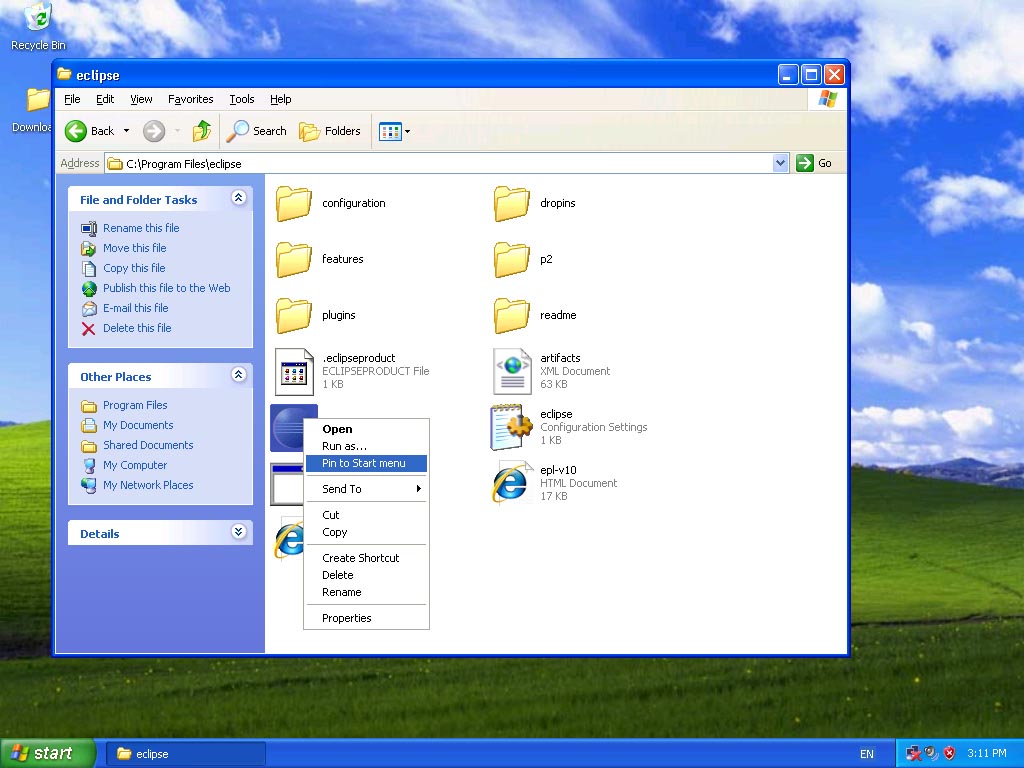
- Unzip eclipse-cpp-helios-SR1-win32.zip to c:\Program Files\Eclipse
- Add Eclipse.exe to the Start Menu (I used the “Pin to Start Menu” option)
Install and configure the AVR-Eclipse plugin
The AVR-Eclipse plugin provides AVR specific functionality within the Eclipse environment. To install it:
- Run Eclipse
- From the “Window” menu select “Preferences”
- Expand “Install/Update”, select “Available Software Sites” then click “Add”
- Enter “AVR Eclipse” and “http://avr-eclipse.sourceforge.net/updatesite/” then click OK
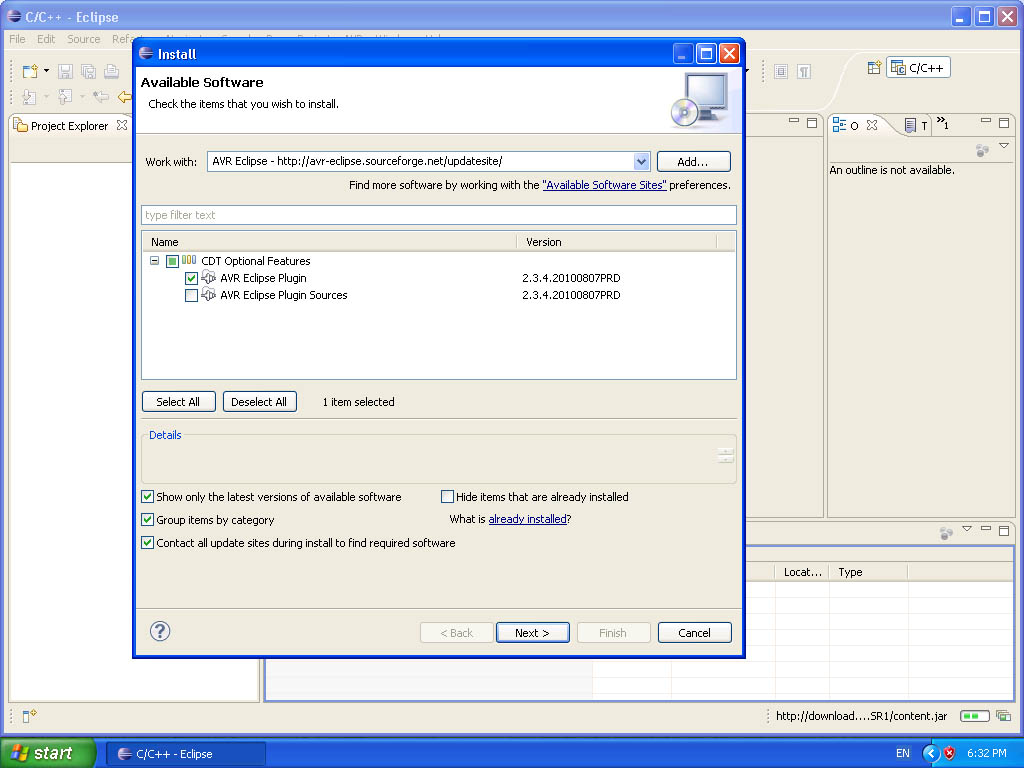
- From the “Help” menu select “Install new Software”
- Select “AVR Eclipse – http://avr-eclipse.sourceforge.net/updatesite/”
- Expand “CDT Optional Features” and select “AVR Eclipse Plugin”
- Continue the installation of the plugin with default options
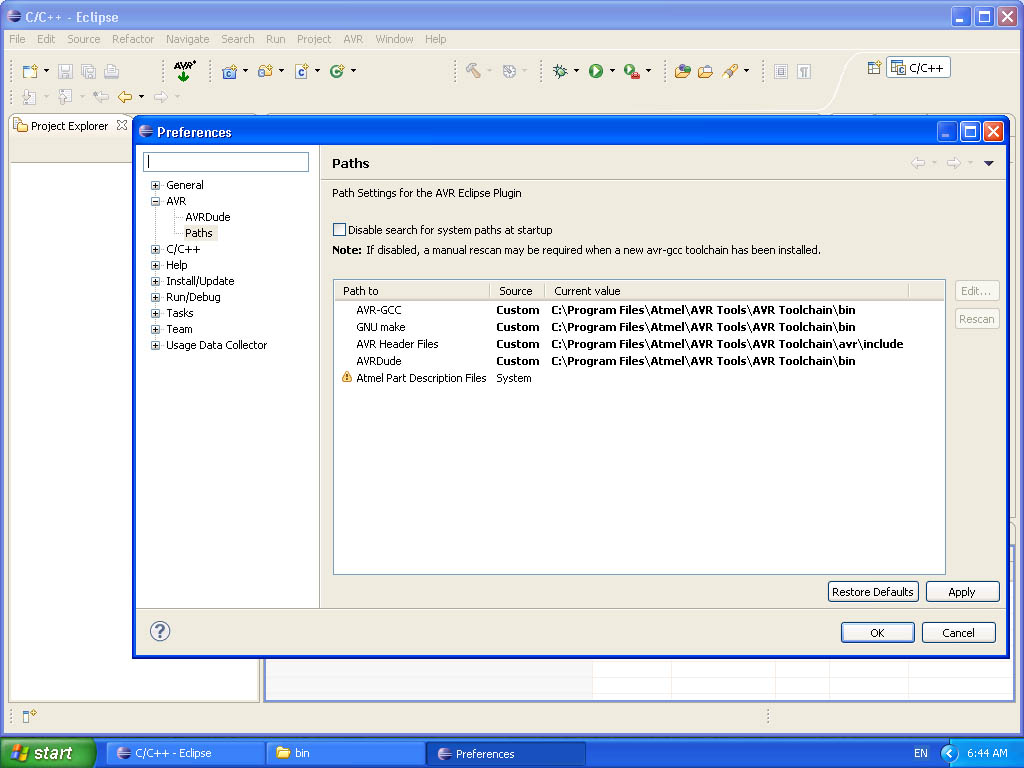
- From the “Window” menu select “Preferences”
- Expand “AVR” then select “Paths”
- Modify each path (except the last one) to be custom
- Enter the paths shown below

For some reason the AVR Eclipse plugin doesn’t always detect paths properly. The next few steps describe how to remedy this problem.

Setup an AVR Programmer
In this tutorial we will be using a USBASP Programmer. To set this up:
- Download and unzip the latest drivers from here
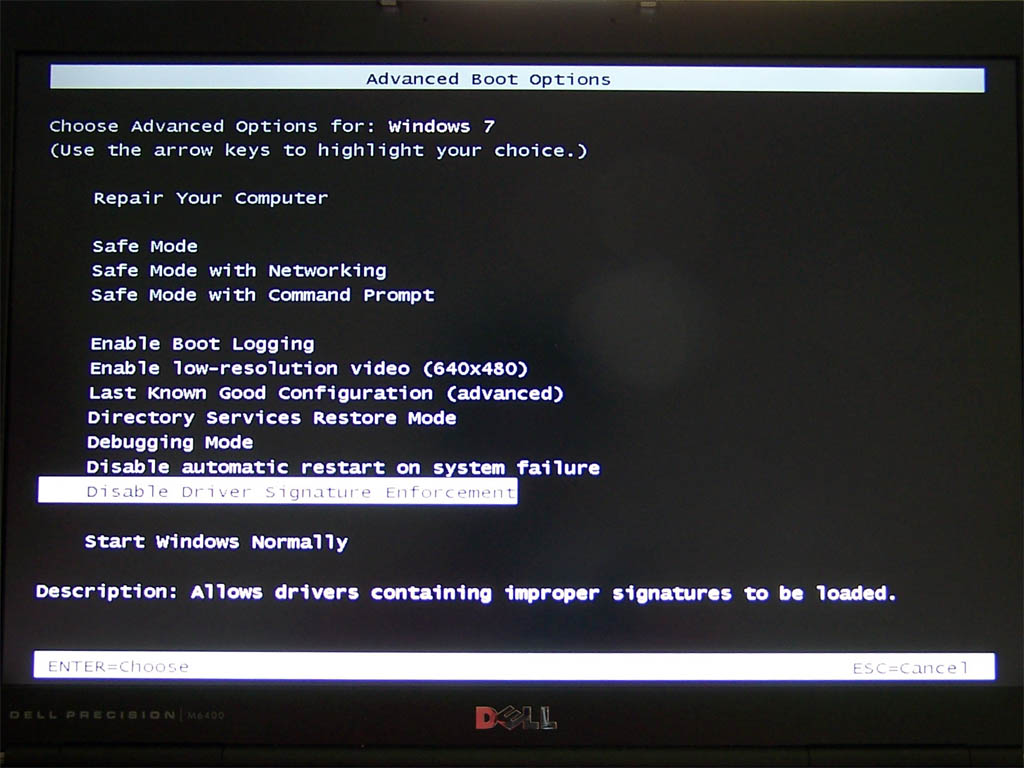
- If you are running windows vista or windows 7 64 bit, you will need to boot into “Driver Signature Enforcement Disabled” mode before you install and each time you wish to use the USB Programmer. This is done by pressing F8 at boot time.
- Insert the USB Programmer
- When prompted for drivers, select the unzipped driver folder
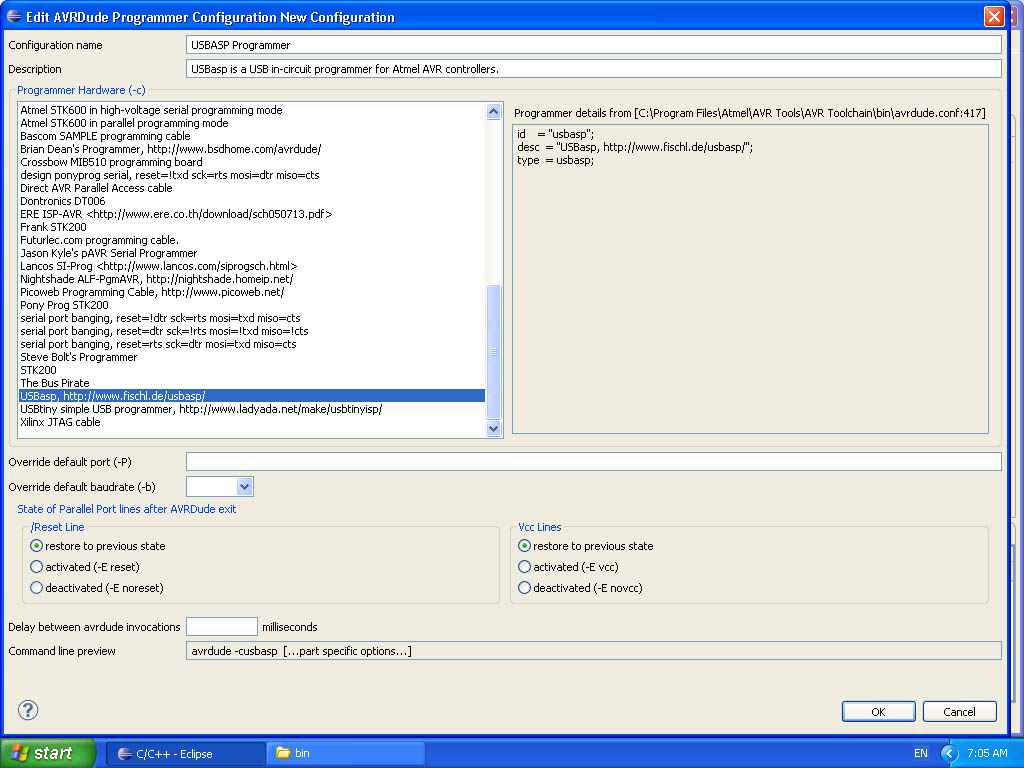
- In Eclipse select “Preferences” from the “Window” menu
- Expand “AVR” then select “AVRDude”
- Click “Add” and enter the following Information
Using Eclipse
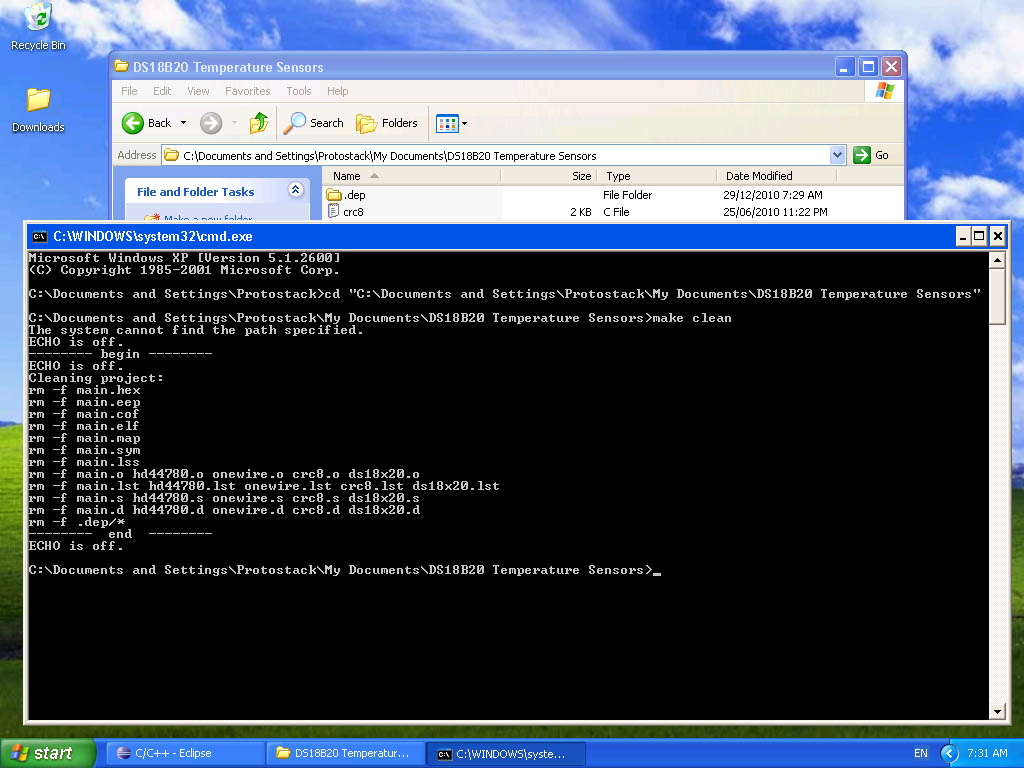
Many AVR code examples will include a makefile which allows the code to be compiled using the toolchain. This can be imported into eclipse but it is better to rebuild the project from scratch to allow AVR-Eclipse functionality to be used. to do this:
- If needed, do a “make clean”
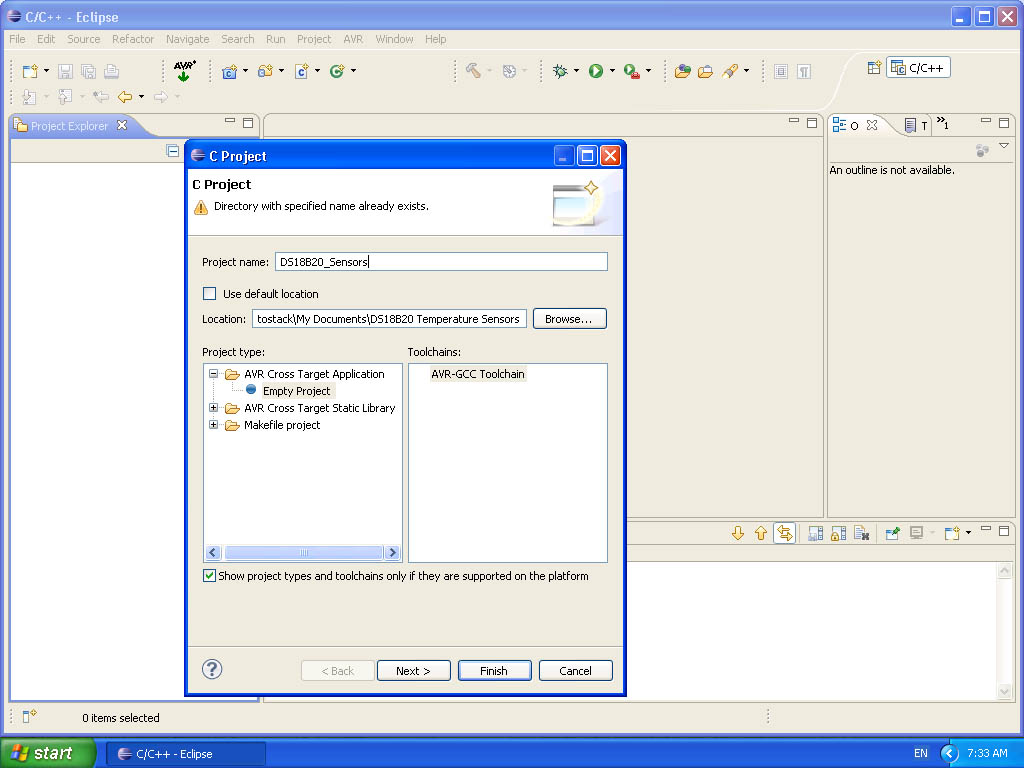
- In Eclipse select “New” and “Project” from the “File” menu
- Select “C Project” then click “Next >”
- Enter the details for your project then continue the wizard, selecting options appropriate for your project
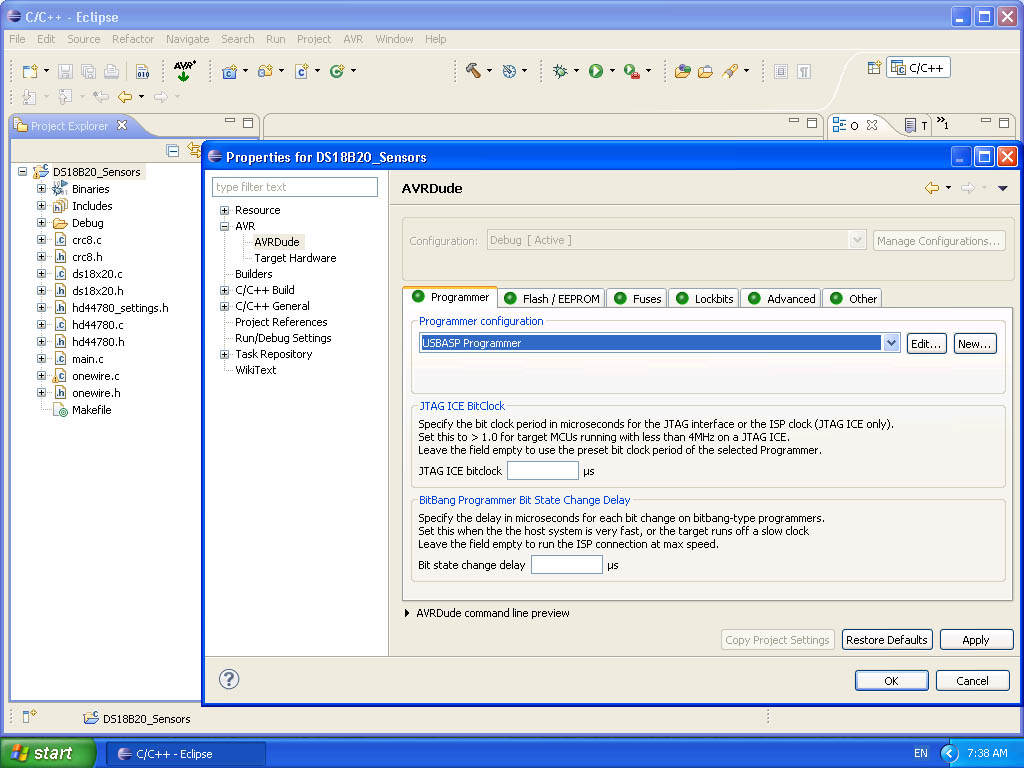
- Right click on the Project name then select “Properties”
- Expand “AVR” then select “AVRDude”
- Select the “USBASP Programmer” configuration
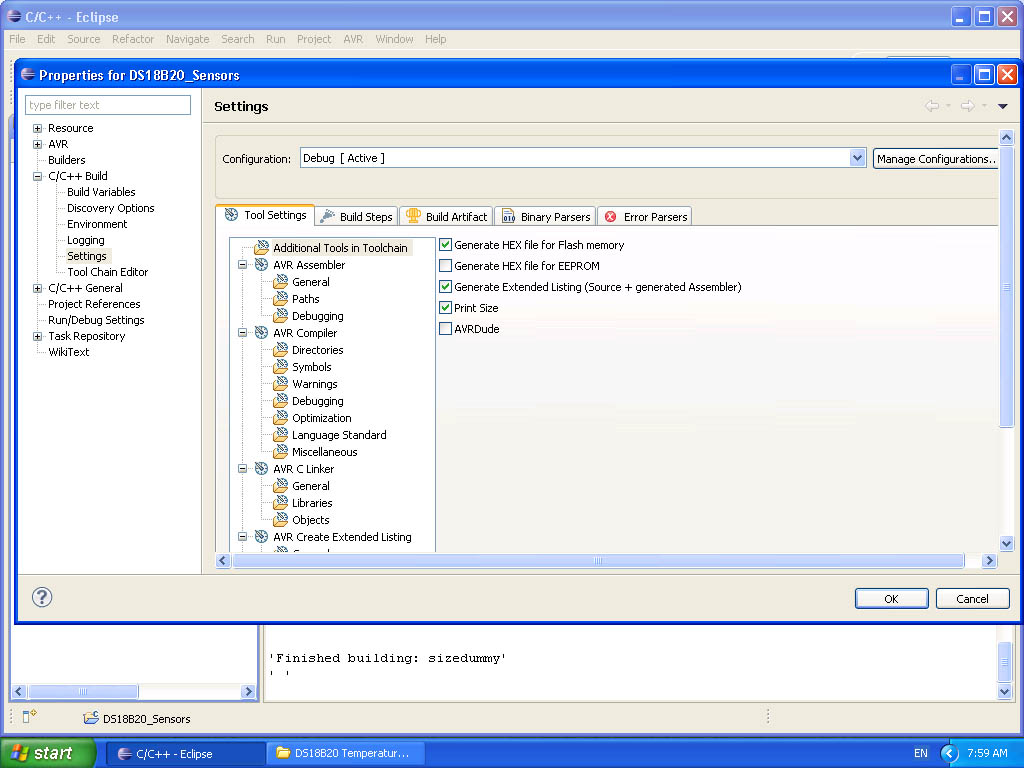
- Right click on the Project name then select “Properties”
- Expand “C/C++ Build” then select “Settings”
- Select “Generate HEX file for Flash memory”
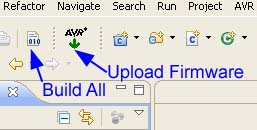
- To Build, click on the “Build All” icon on the toolbar
- To upload your firmware, click on the “Upload Firmware” icon on the toolbar


Hi
Will Eclipse work on window 2000? I have WinAvr installed
I have been using assembler for the AVR but find it very hard to do math functions. For most projects I can by fine with avr studio and jtag ice.
Don
I can’t see why it wouldn’t work on Windows 2000. Have a go and let us know how it works.
Excellent tutorial Daniel. Very professional.
I have followed the instructions two times on different machines now.
I encounter two problems, perhaps you can advise:
1. The zip files on protostack website with USBasp drivers are damaged. I had to download from the original site at http://www.fischl.de/usbasp/
2. From scratch this Eclipse environment does not generate a proper make file.
The ‘make clean’ command does not work and when I add a source file it still states ‘Nothing to build for project ‘. There is no make file, which I suspect should be made at ‘create project’ time?
Can you provide help for this? I haven’t found a proper makefile. I guess you had an old one as you came from older software?
yea i had the same problem, right at the end on the last step i got
“the file [file location/file.hex] for the flash memory does not exist or is not readable”
just had a look, it seems this was because an error in the code i was using…sry
Nice writeup. Wished this were available when I was setting up my environment. I’ve done this setup on both Win7 (x64) and Ubuntu Linux. The information is out there, but difficult to find all in one convenient place. However, once it’s set up, Eclipse is a true joy to use for development.
Any advice/tips on setting up GDB for AVR? So far, I’ve been unsuccessful doing this.
Thanks!
Hi.
Your tutorial is everything I’ve been looking for! AVR Studio 4 isn’t the best IDE, and I’ve used Eclipse before…so when I saw this, I literally jumped at the opportunity.
However, I’m doing it on Ubuntu, and I’ve installed everything, and it seems to work, except for a very tiny bug.
Even though is included (using avr-libc), the IDE fails to recognize PORTB, PORTD, ADCSRA, etc etc.
I’ve included and and even . The defines and typedefs in them work perfectly fine. For some reason, is having issues.
I can’t develop anything without those SFR definitions! Someone please help me!
…Sorry, and before I forget, I’m using gcc-avr 4.3.5 and the avr-libc available in Synaptic (1.6.8-2). I also just included (the Mega16 include file) and compiled. I no longer get that error. But at the same time, I can’t keep finding the particular include file per chip, and there’s even a compiler error in iom16.h telling you to include io.h.
Help, somebody,please!
I followed all the steps shown above for eclipse installation and also USBASP programmer.
there is an error I am getting:”could not initialize target hardware”.
The following, Not as expected. Installer link no longer works.
Navigate to http://www.atmel.com/dyn/products/tools.asp?family_id=607#soft, scroll down and click on the Register icon
Are the tool chain materials copyrighted? Perhaps you know of another site that I can download them from.
I have the same problem. No tools are available
how to connect avr jtag clone in that